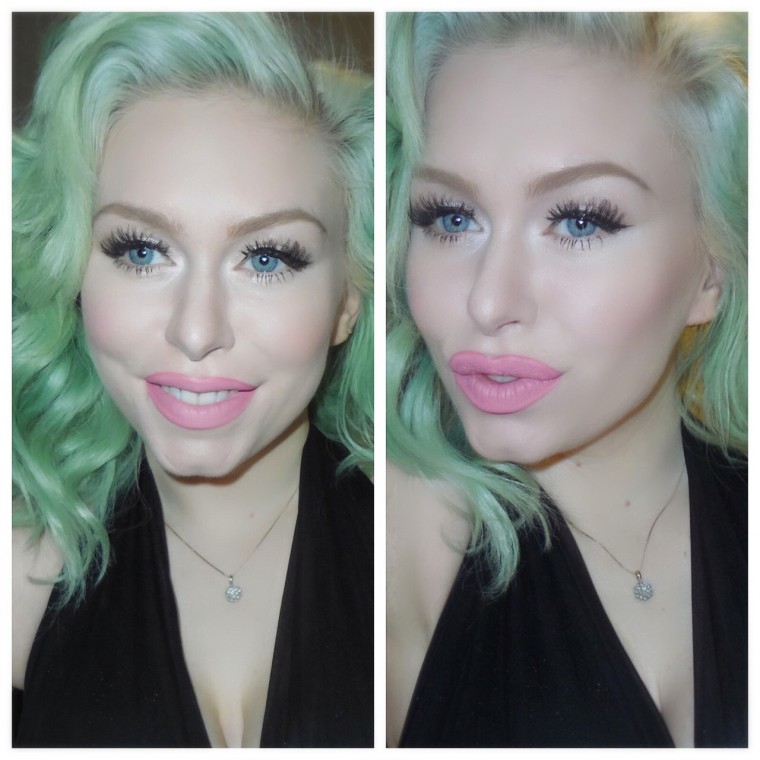
Plump lips have always been desirable, but it seems that lip fillers are more popular than ever lately. I for one am all about bigger lips…but I also don’t really want to spend the money on the upkeep of injections. So if you are like me and would rather spend your money on things like food, animal charities and 25 shades of basically the same lipstick (yes, I need every single one of them) then that’s where my friend lip liner comes into play.
Don’t get to the register and put the lip liner back. You don’t have to buy 100 of them. You can buy one that works with a majority of your everyday lipstick shades to start with, but you absolutely need one in order to create depth on the lip and draw out the shape.
If you want to go for more of an outrageous pout then the liner should be darker than your lipstick so you can make the exaggerated shape more believable. However, when it comes to overdrawn lips less is definitely more.
You can change the shape of your lip if you want, but I like to follow the natural shape. That way it enhances instead of completely changing the lips.

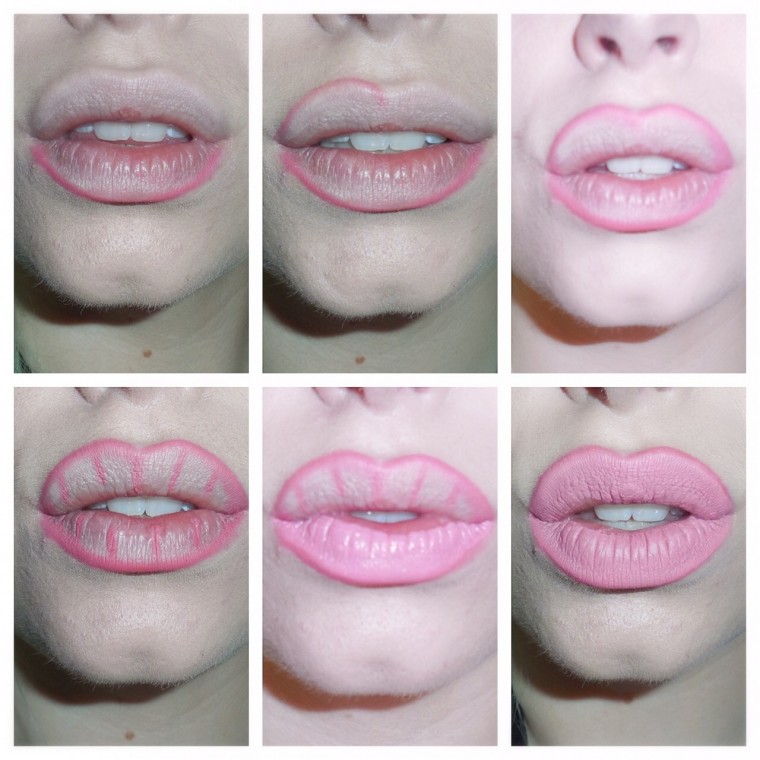
- I usually start with the bottom line. For me, I have a fuller bottom lip so I don’t draw too much beyond my actual lip, but you can outline right below it basically hugging your lip line.
- Start drawing the top line. You want the corners to stay pretty close to your actual lip so it doesn’t look like “clown lips” but you can enhance the shape of the cupid’s bow to make them appear larger.
- Repeat step on the other side of your top lip. If you feel like you did too much wait until the last step and then clean it up with makeup remover and concealer.
- I like to draw these lines inside the lip so that the lipstick blends better, or you can just fill your entire lip in with the liner. Keep in mind if you fill in the entire lip it will manipulate the color of the lipstick, so you just need to decide the end result you want.
- Start applying the lipstick, and blot it down.
- Once you filled your entire lip in with the lipstick it gives you a clear vision of the end result. This is the point you can either get really excited and make pouty faces in the mirror or be ready to throw the flag in. Don’t worry if you didn’t nail it the first time it takes practice. Take a Q-Tip with some makeup remover and remove a little at a time to anywhere that doesn’t look crisp or if it seems too much. If its just a tiny little spot then concealer without remover should just fix the problem. I like to use an angled brush to clean up any imperfections so that you have good control in fixing the spot. You can also choose to use concealer around the whole lip to make it extra crisp. I did not do that in this tutorial.

Feel free to tag me in any pictures on Instagram @jessa_rabbit. I’d love to see! If you have questions you can email me at jessieashley@ymail.com
MUCH LOVE XO
You must be logged in to post a comment.